Subscription Plans
Billing users for a subscription plan is pretty straight forward. Every Plan hasOne Role, so when a user subscribes to a plan they will inherit the permissions associated with that user role.
The Plan you create in Wave will reference a plan you create in Stripe or BrainTree.
Current Plans
When you install Wave you will see there are 3 default plans:
- Basic
- Premium
- Standard
You can delete these plans and create your own if you would like or you can edit the current plans.
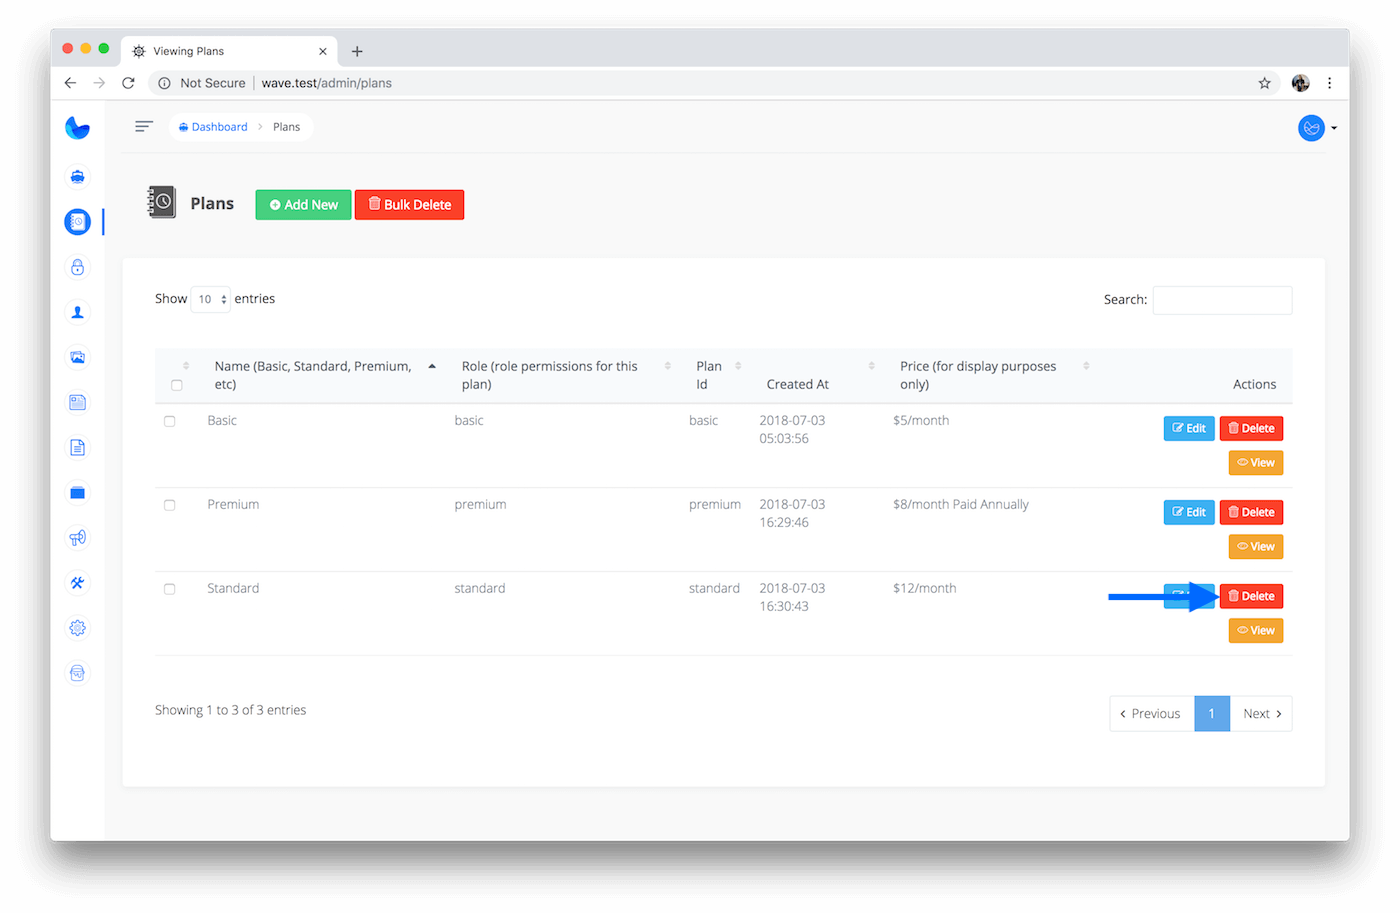
Deleting Plans
In order to show you how to create a new plan, we will delete the existing Standard plan. To delete plans you can visit /admin/plans and click Delete:
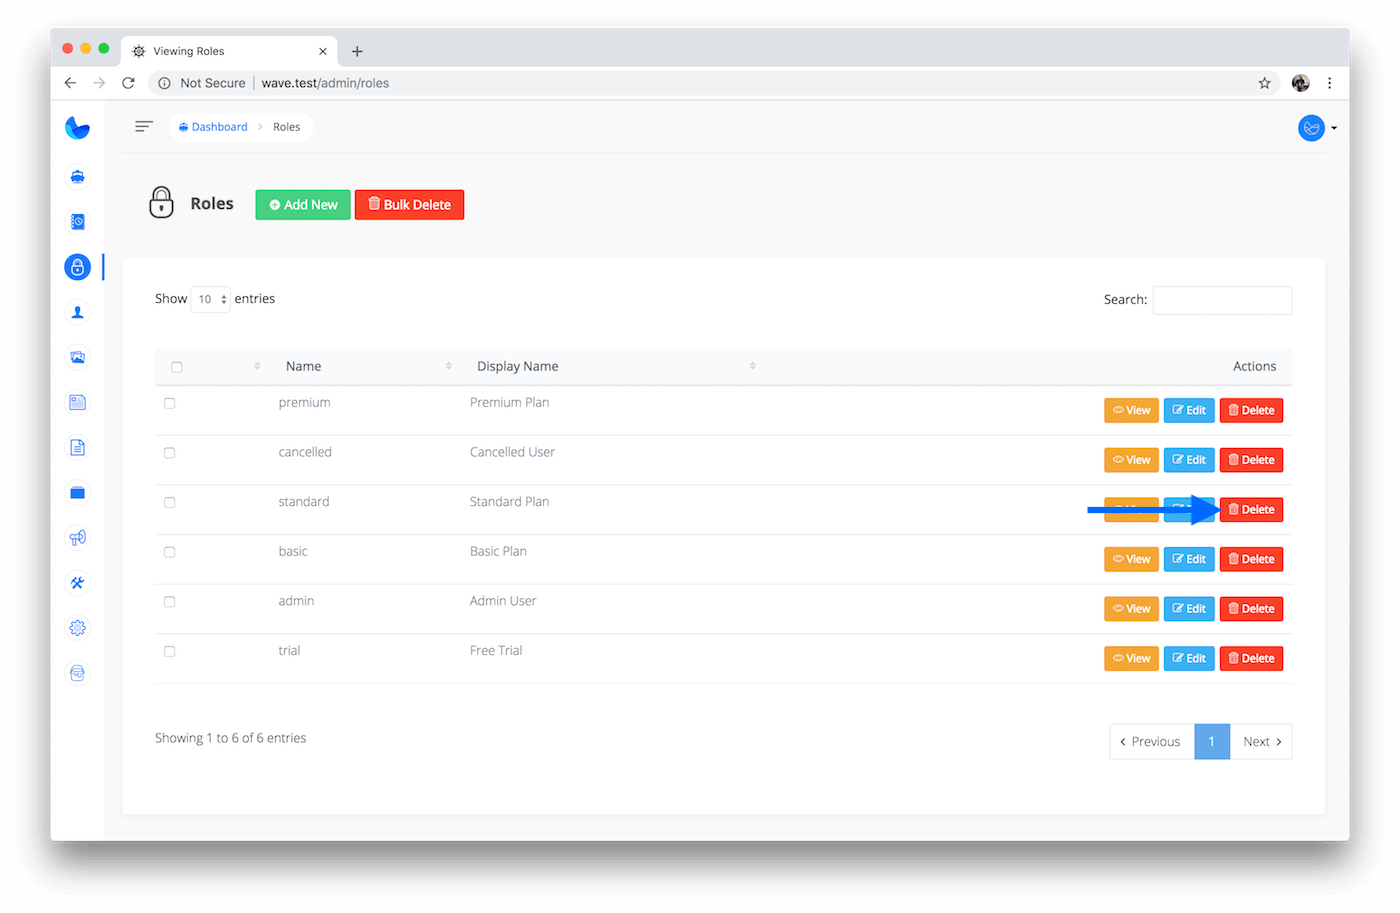
Since our plan is associated with a role, we will also delete the associated role at /admin/roles
We will cover more about User Roles in the next section.
Creating Plans
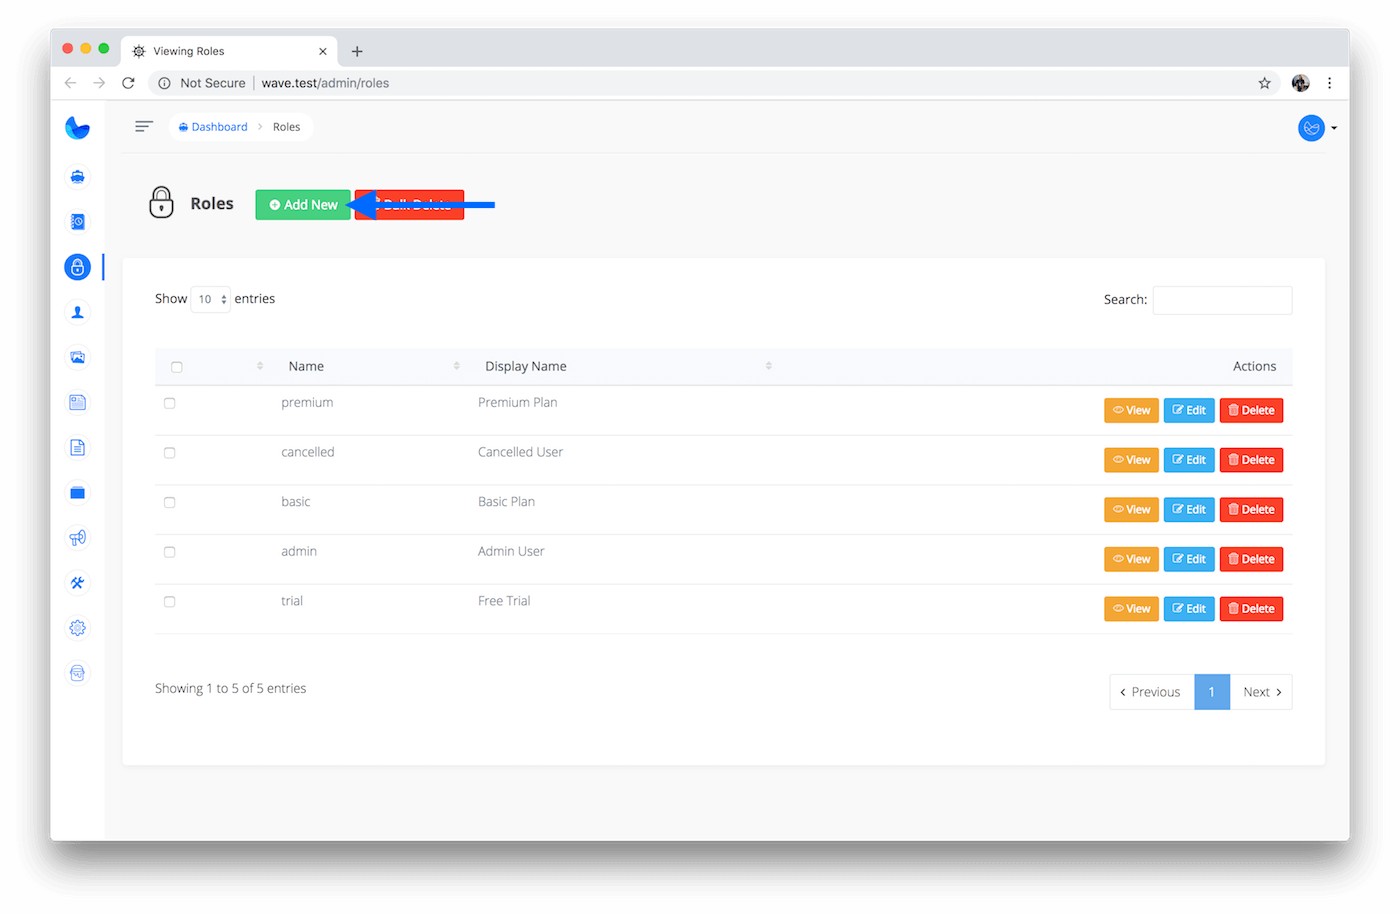
Now, let’s create a new plan called starter. But before I create a new plan I will first create a new role that I want to assign to this plan. My new role will be called starter as well, but you can give the role any name you would like. To create a new role click on the Add New button.
Then we can create our new role called starter
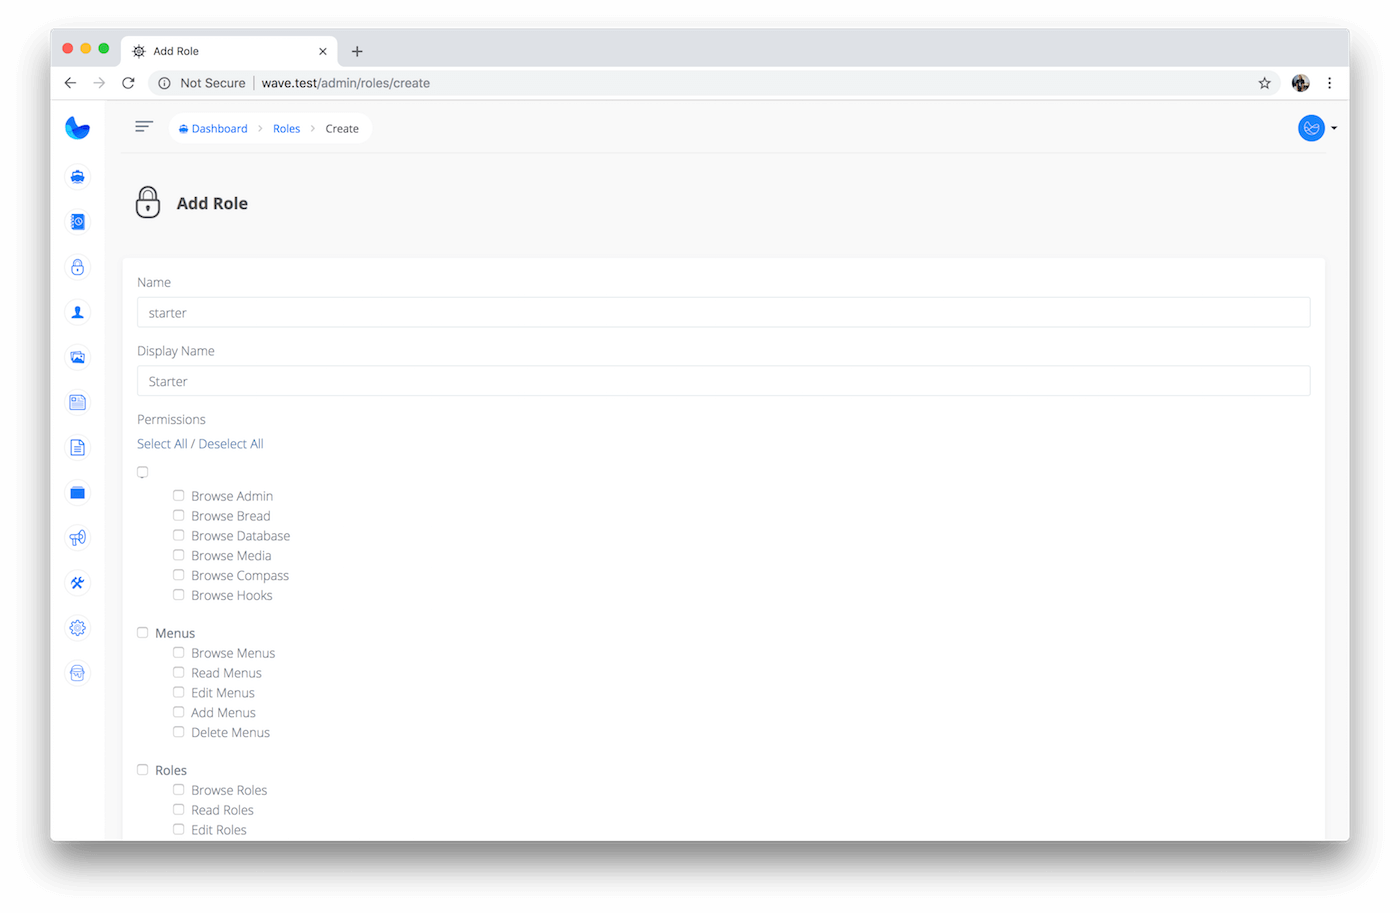
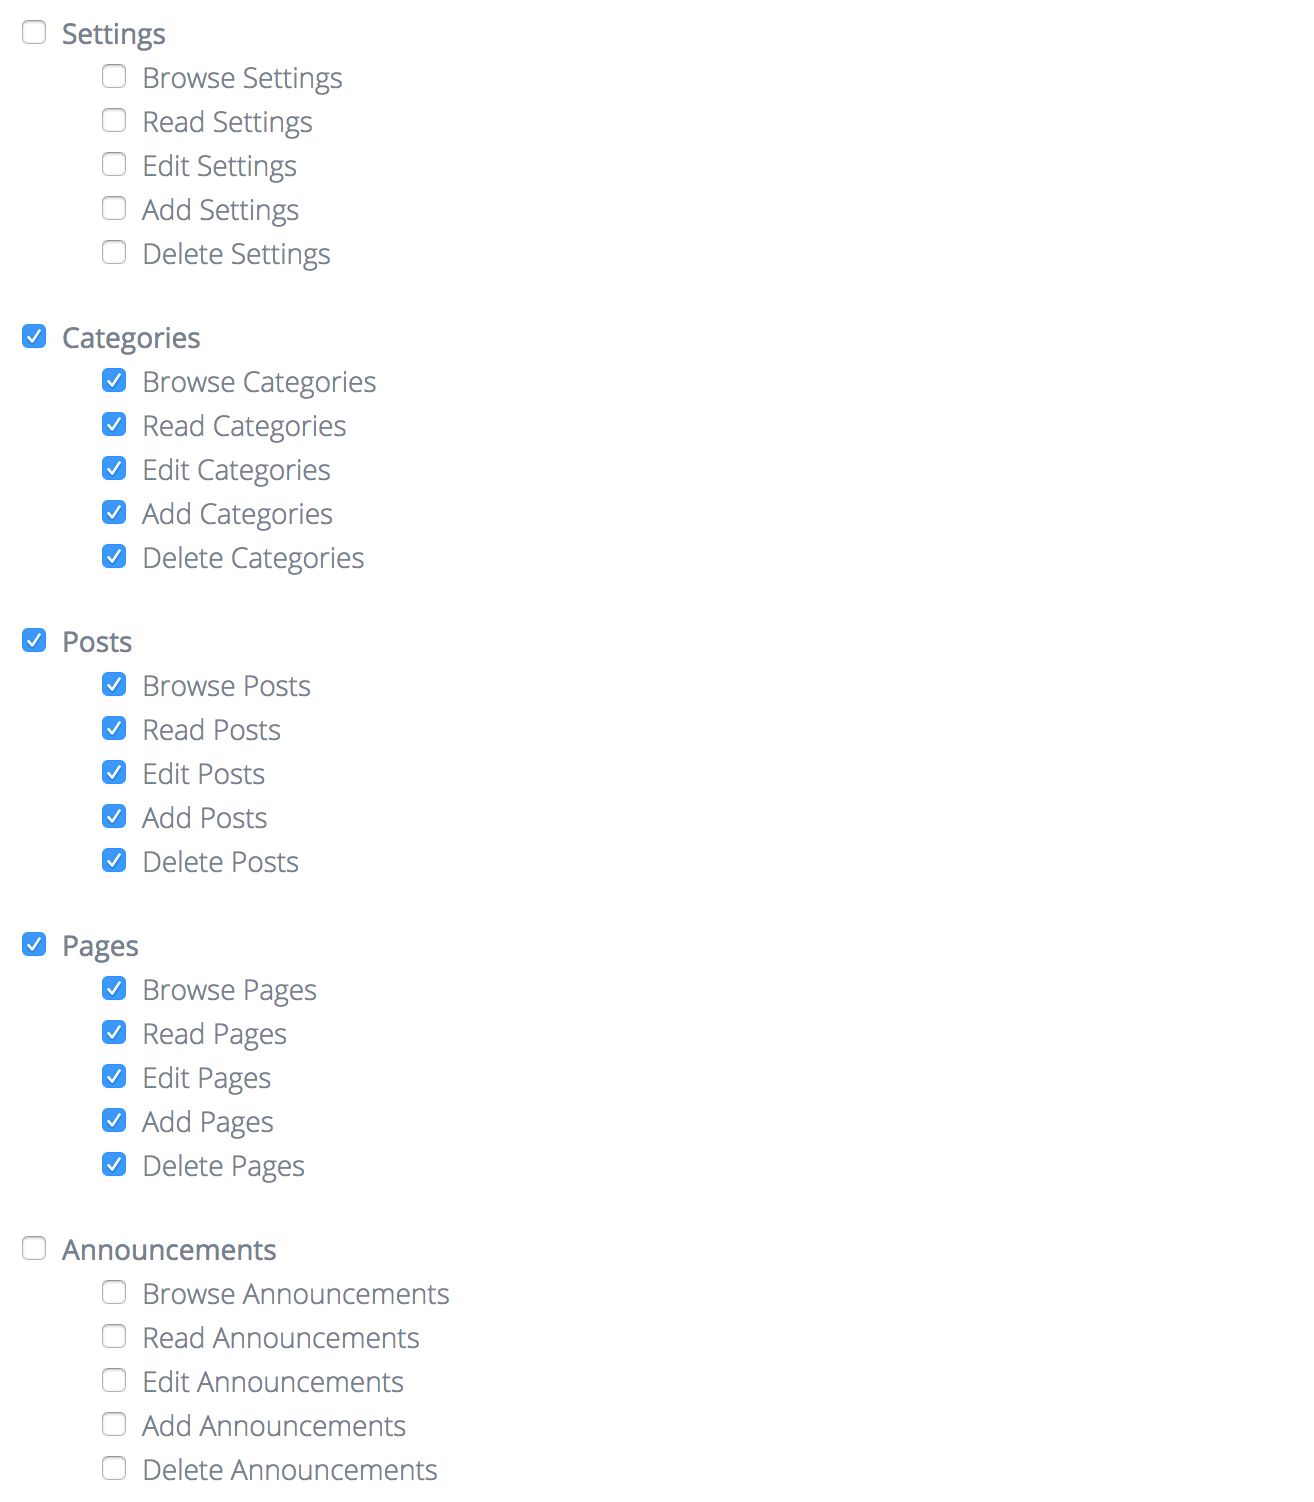
Notice on this page you can specify permissions for this role. We will talk more about this in the next section. For now, you can choose to check a few of them, or leave them all unchecked. Below is a screenshot of what I have checked in this example:
Now that the role is created we can create a new plan and associate it with a role:
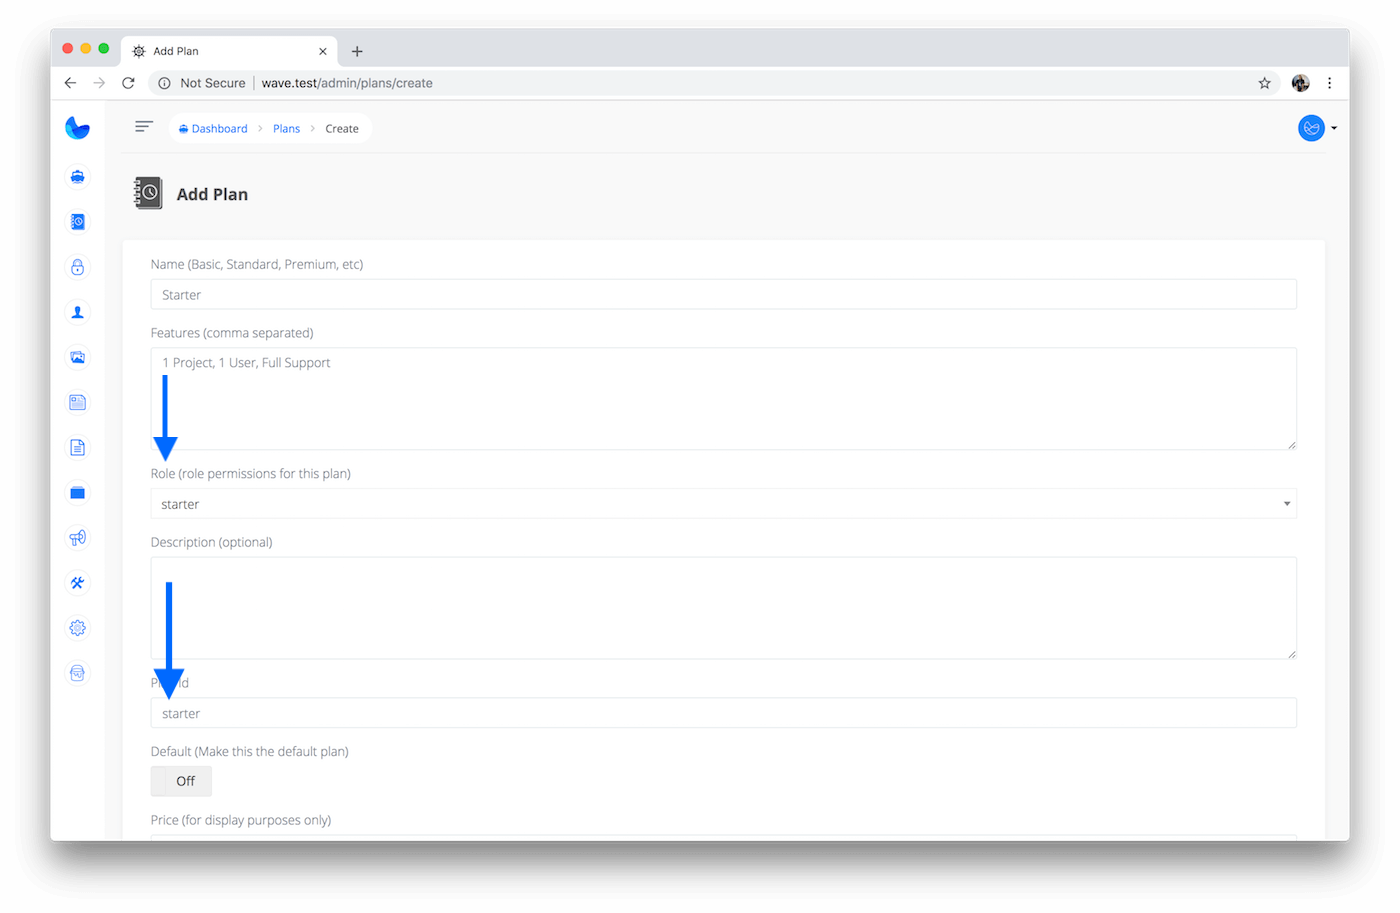
{primary} Notice the Plan ID when creating your plan. This Plan ID is an ID we need to create in Stripe or BrainTree. We'll do this in the next step.
Fill out the rest of the info on the plan and click Save to create your new plan.
Creating Plans in Stripe
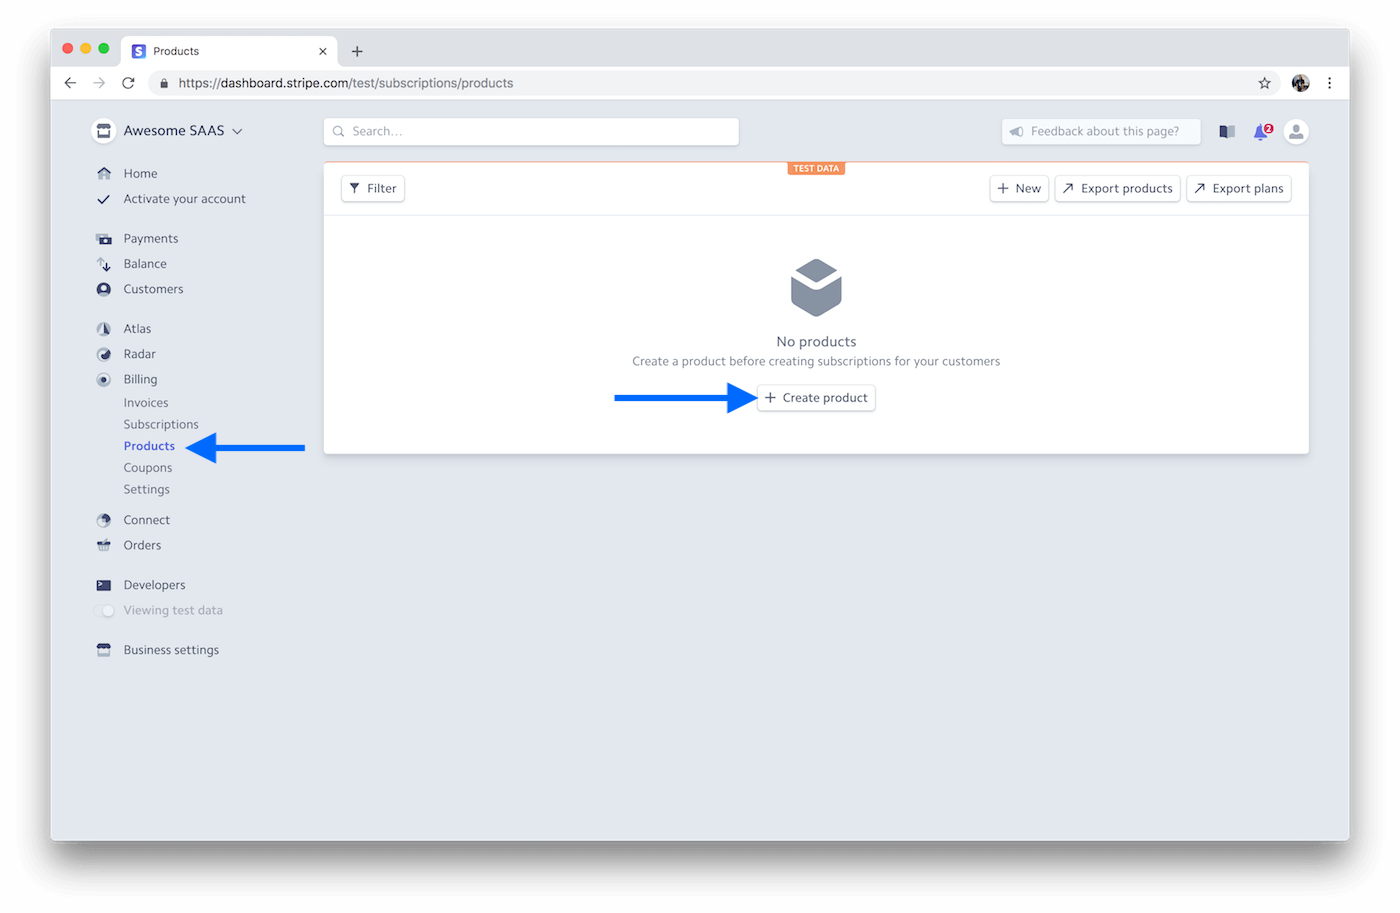
To create a new plan in Stripe, login to your dashboard and click Products->Create Product
Next, you'll give the plan a name and click Create Product
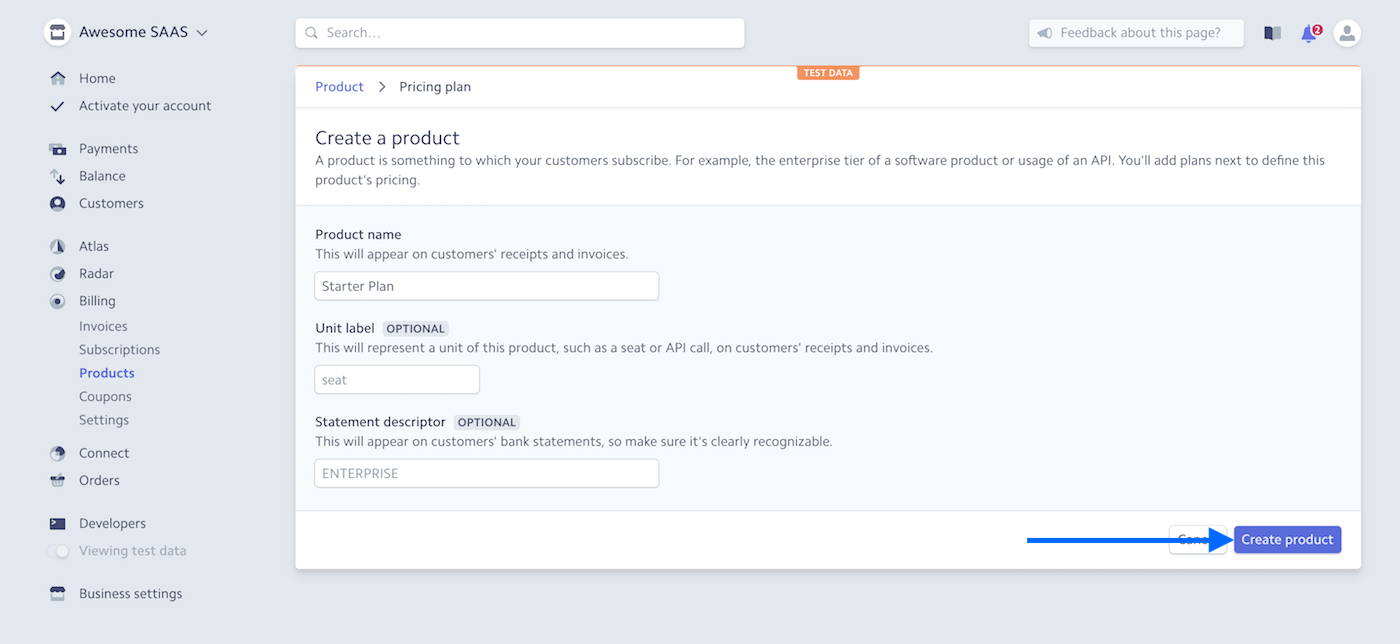
Next, you'll be taken to the Product Pricing page. This is where you can specify the ID that we reference in our plan for our site.
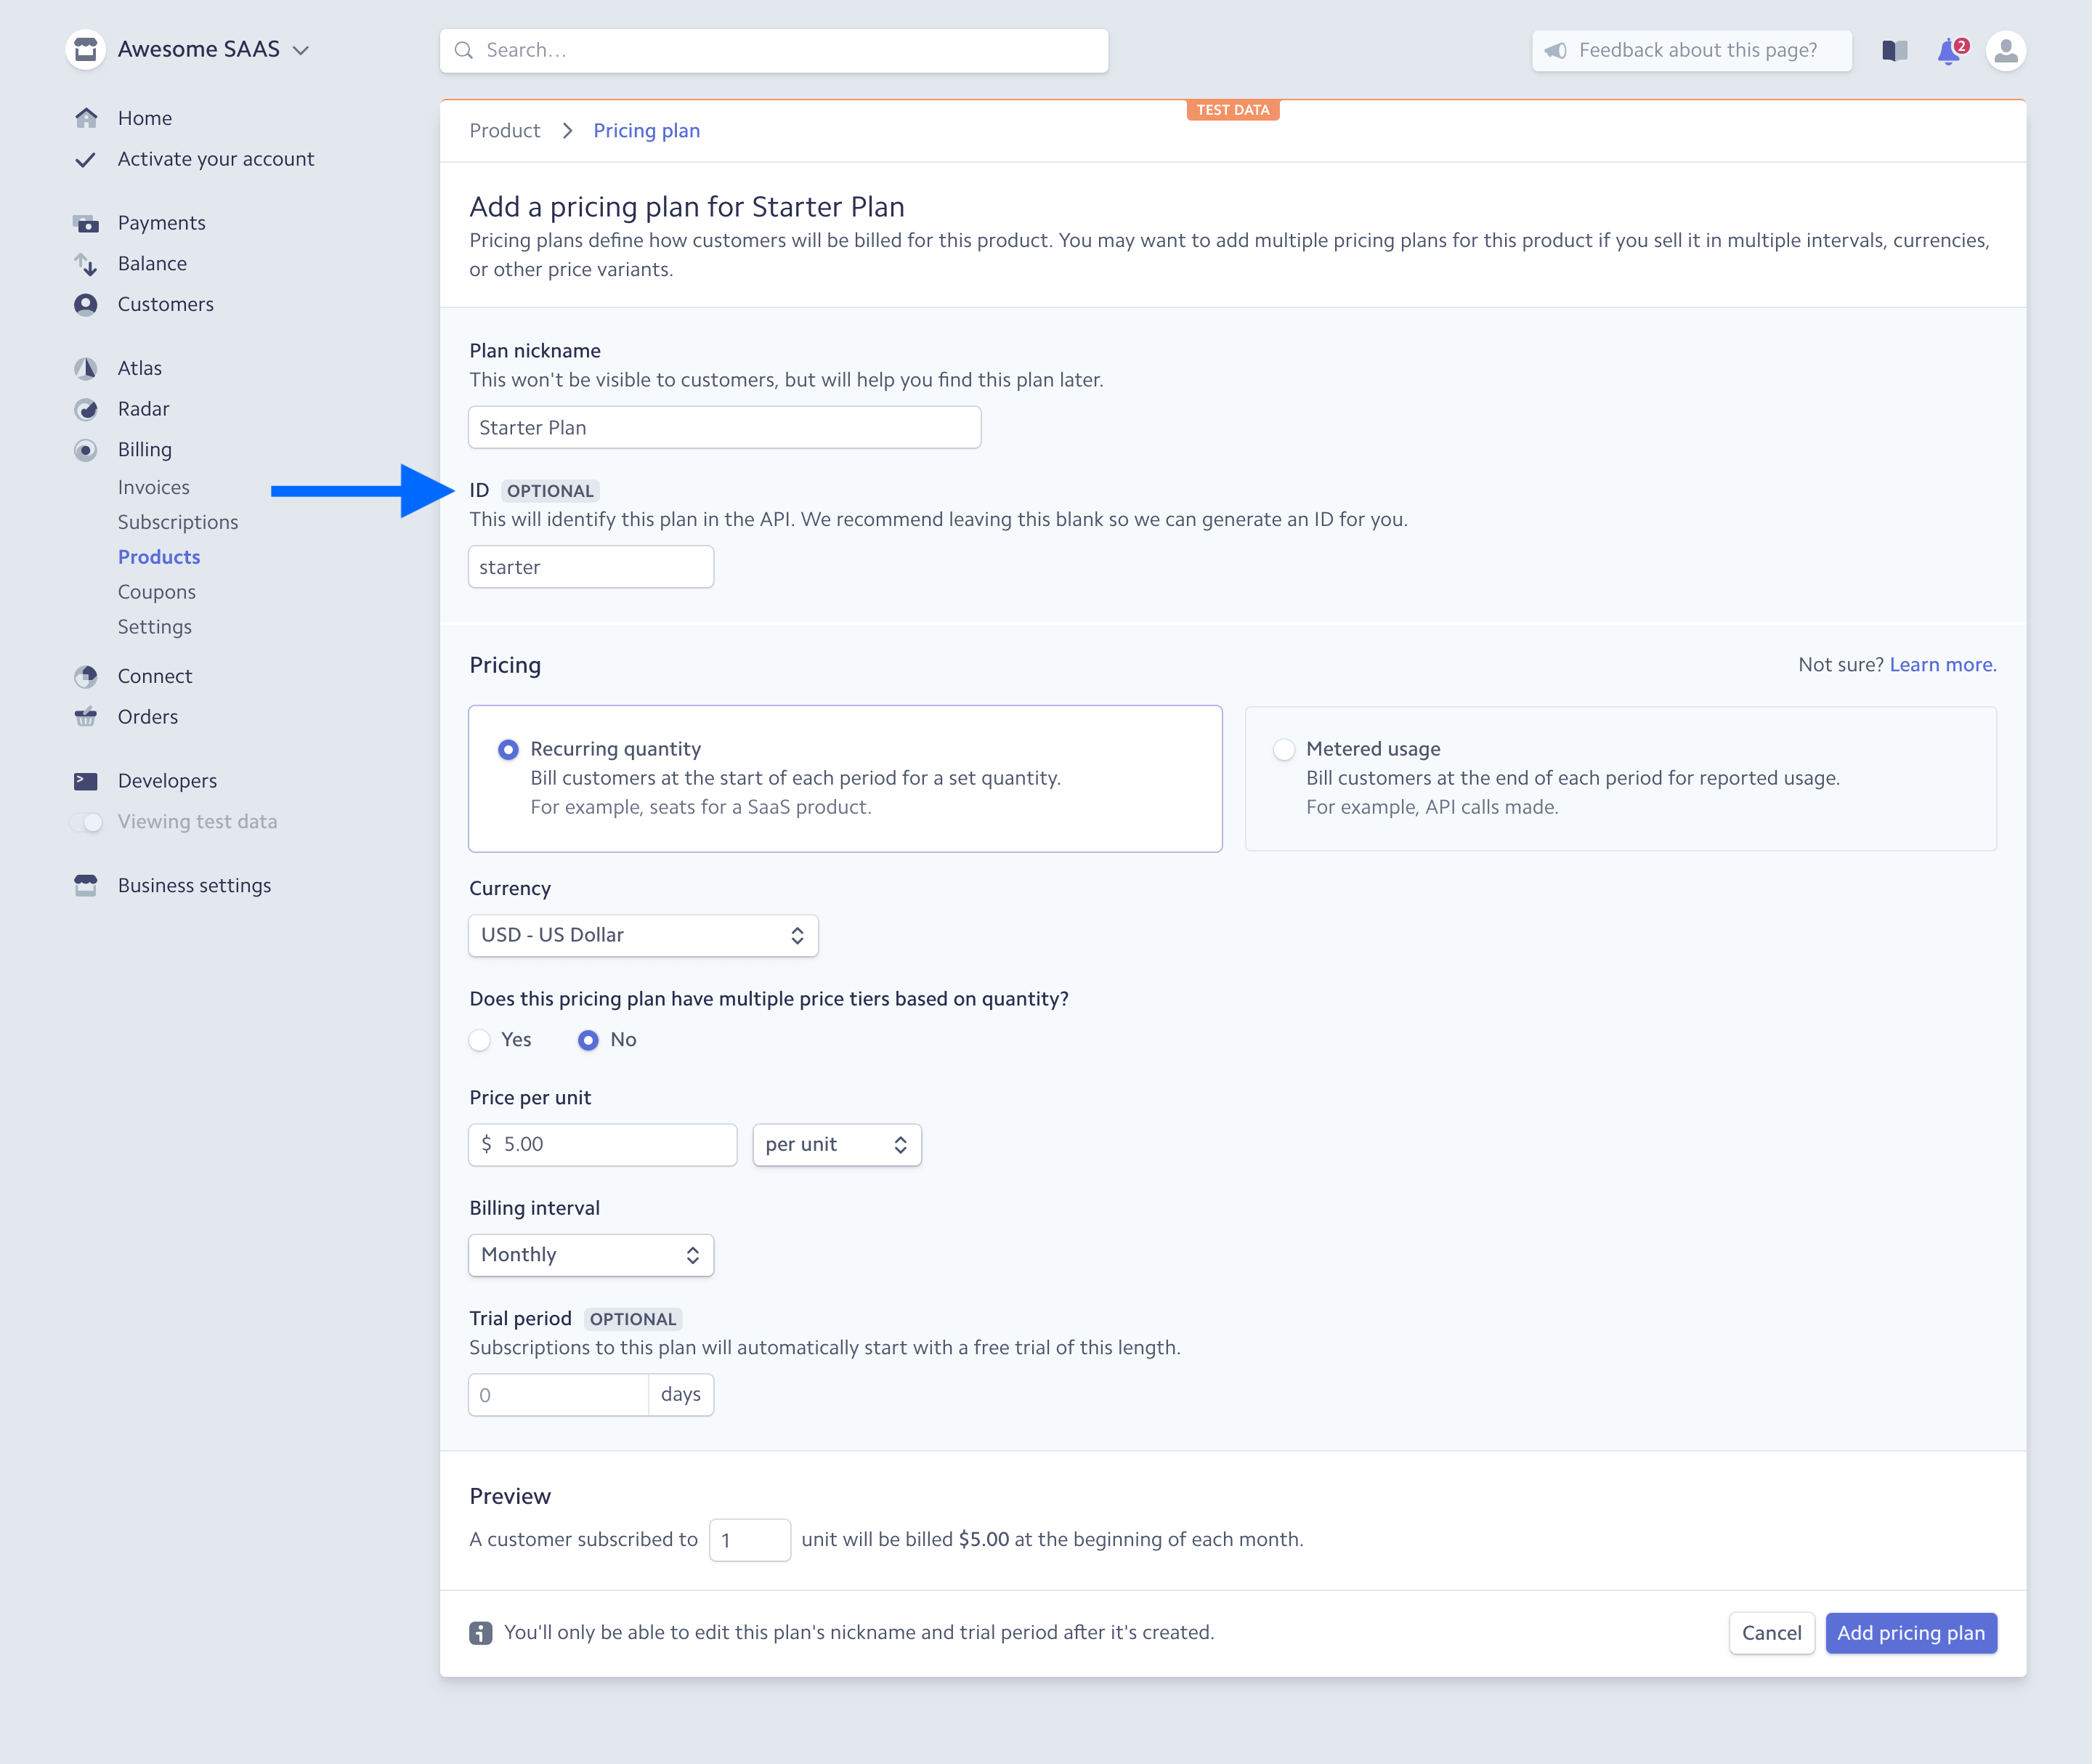
After you fill out the necessary info, click on Add Pricing Plan to finish creating your plan. And now your users can signup for your starter plan.
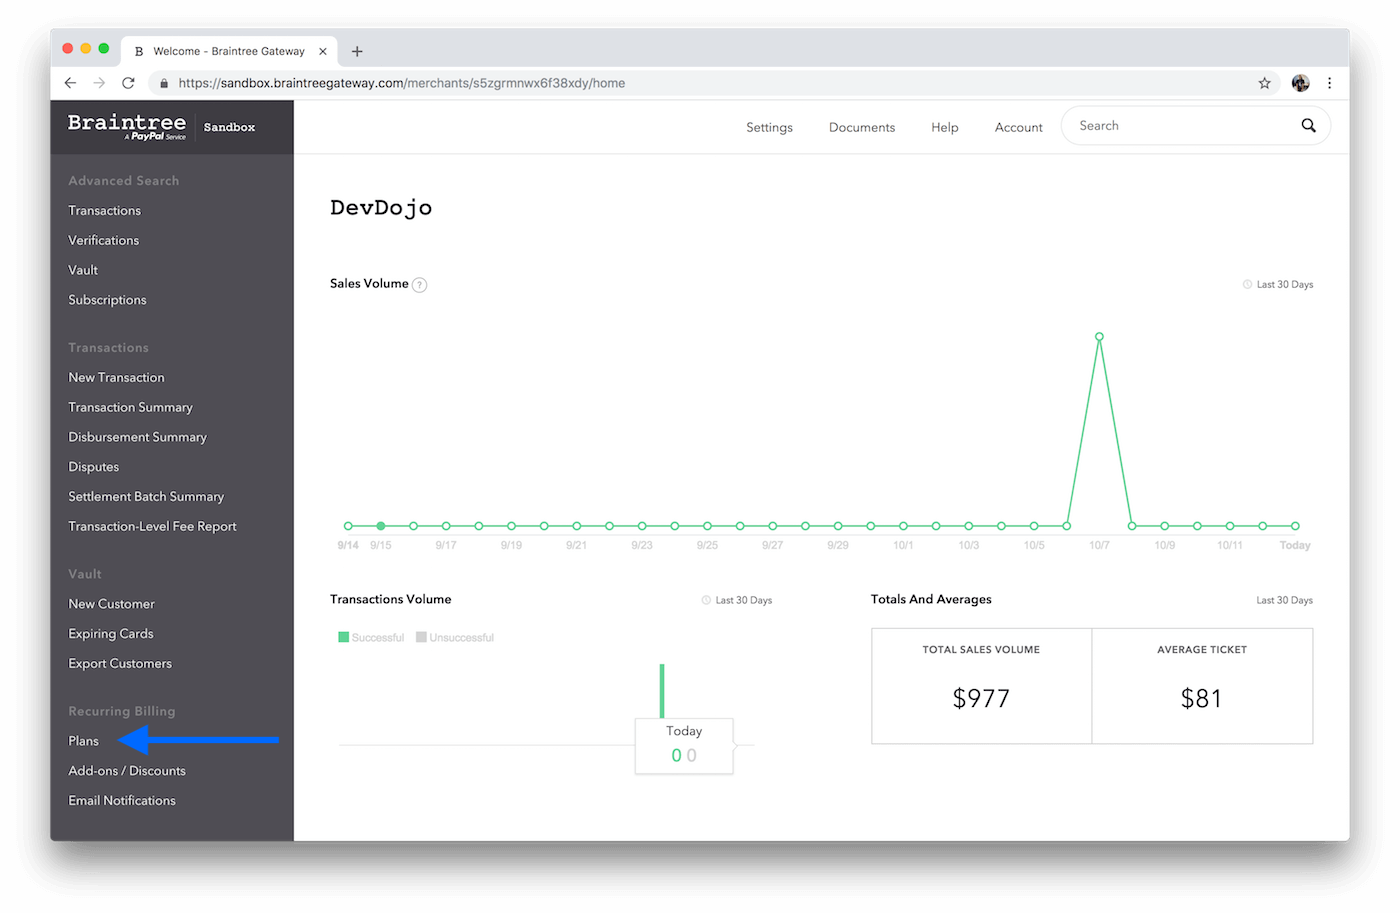
Creating Plans in BrainTree
To create a new Plan in BrainTree, login to your dashboard and click Plans
Then, click on the New button
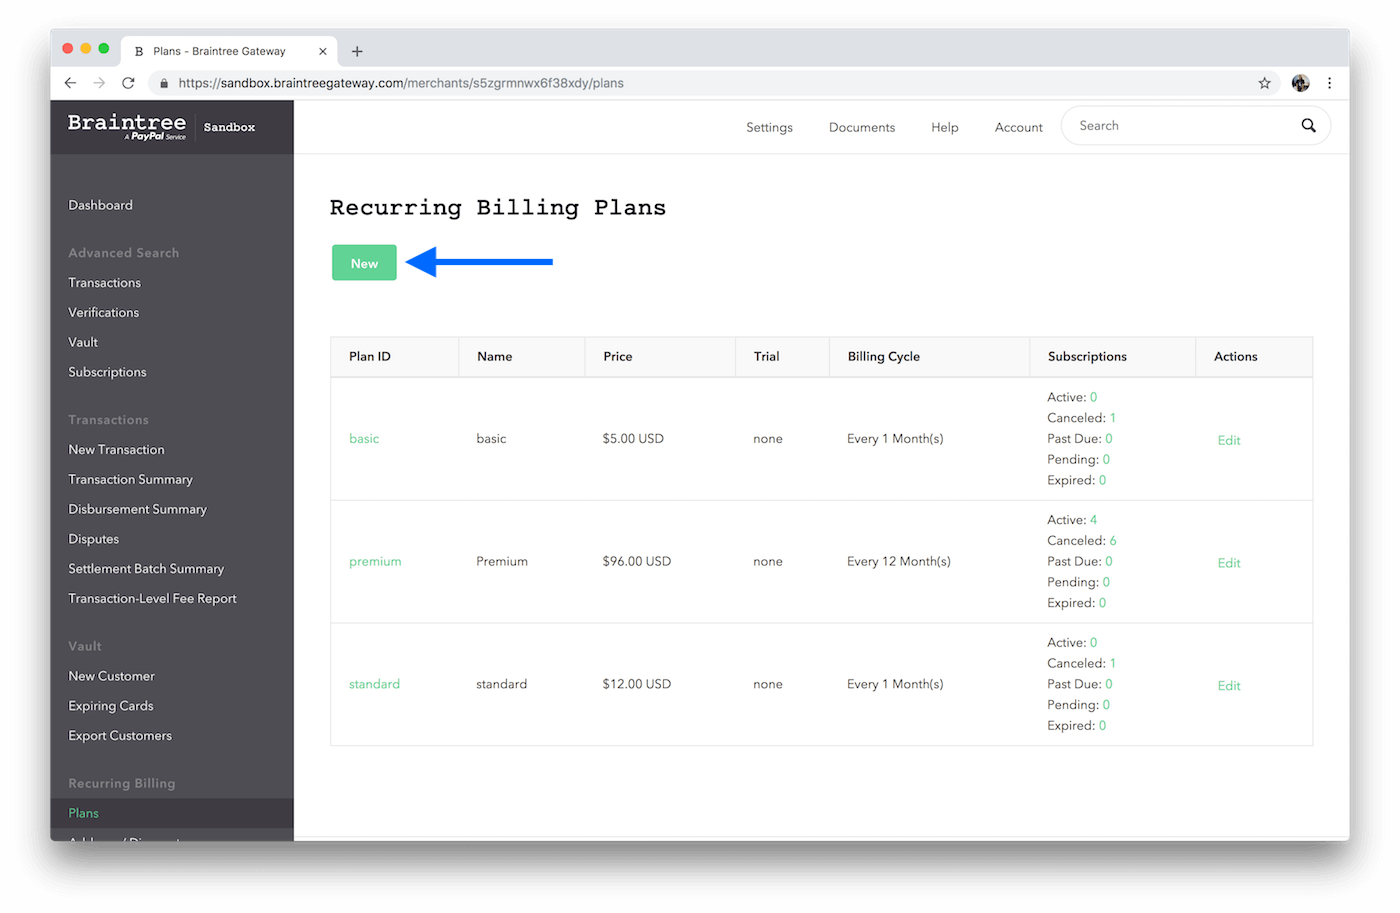
Then fill out the information to create your new plan. Notice the first input is our Plan ID that we reference in our application.

After you create this plan in braintree, users will be able to signup for that subscription plan in your app.
Next, we'll talk about User Roles. Remember every Plan is associated with a User Role, and this is how we will determine what a user has access to in your application.